

You know that moment when you finish animating a gif and go through the whole process of exporting it (usually through multiple programs) only to have it lagging. There are websites where you can speed up a gif (like ezgif.com) but large files tend to crash.
After looking for a go-around for ages, I finally found the answer. Buried deep on an Adobe forum was a question from 2012. The user got a fragmented answer in 2014.

The method
First, you have to export the animation from AfterEffects and then fiddle about with it in Photoshop. Below you have the two methods which I use.
Method 1: jpg
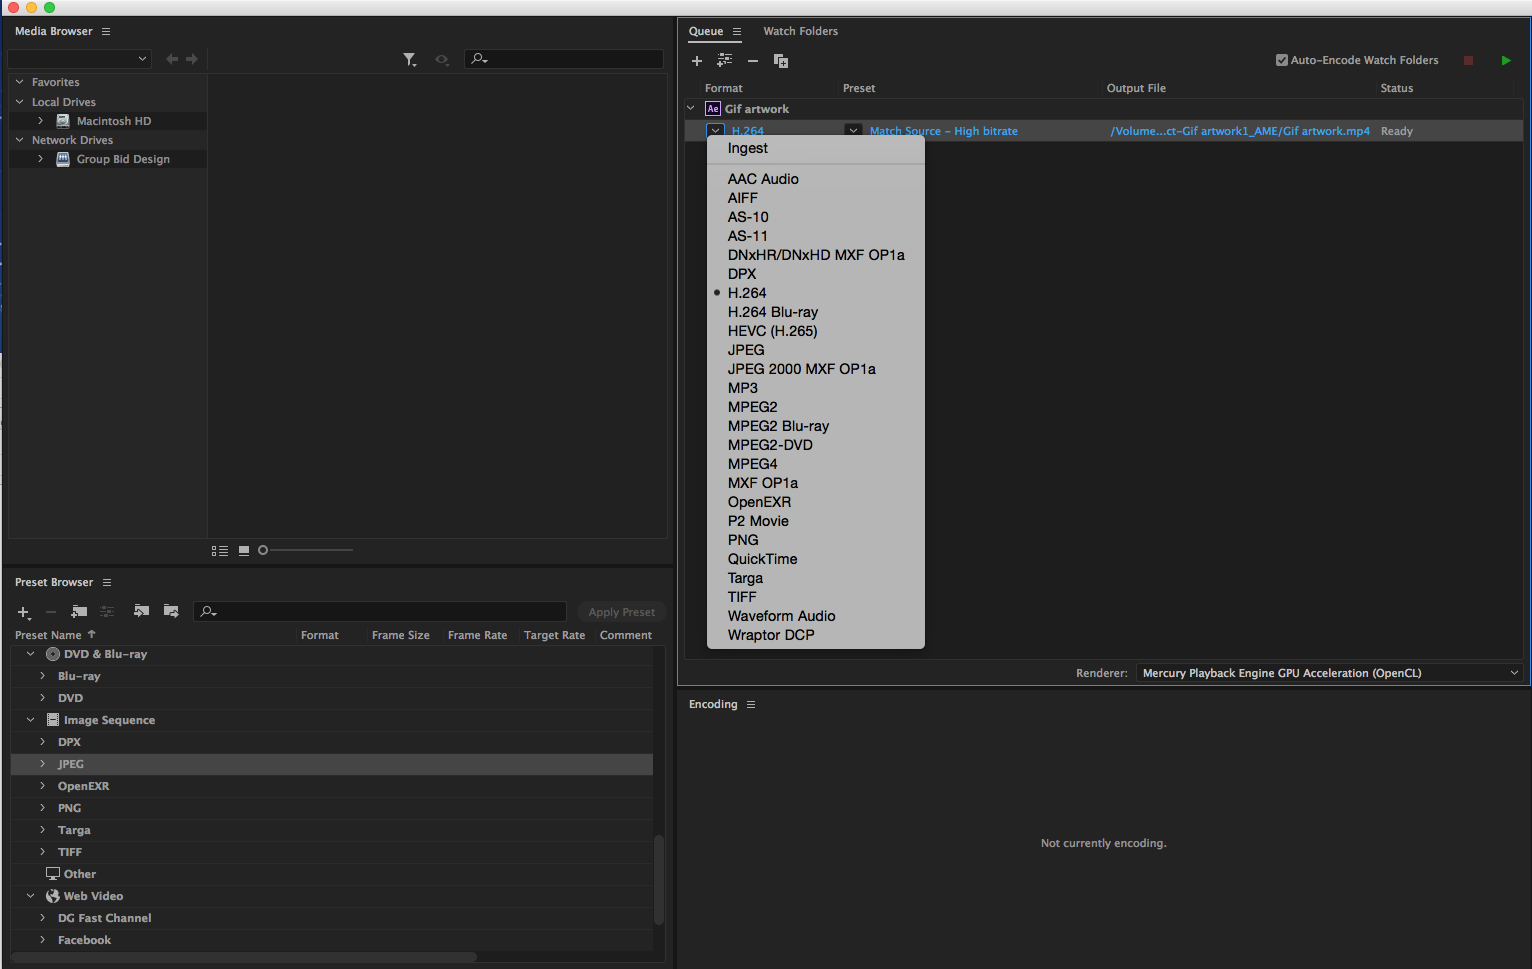
When you have finished the animation, export it with Media Encoder:

Media Encoder should start automatically. Change the output format to JPEG and click play (top right-hand corner):

Don’t forget to choose the Output file – which is the place the JPGs will be exported to.
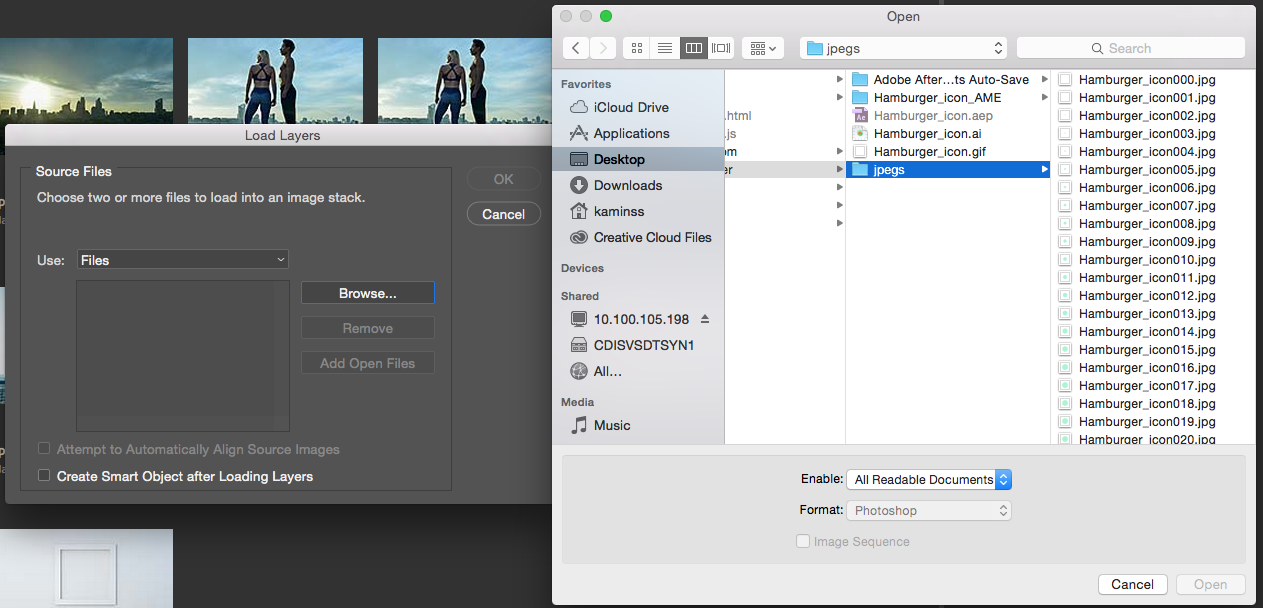
Open Photoshop, go to File > Scripts > Load Files into Stack.

Click Browse and find the exported JPGs. Select all (cmd+A) > Open > OK
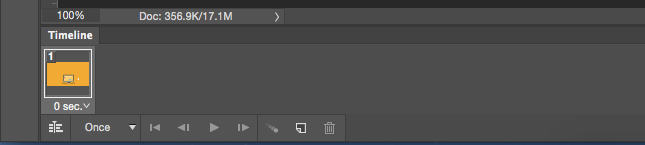
Once loaded, open the timeline and click Create Frame Animation.

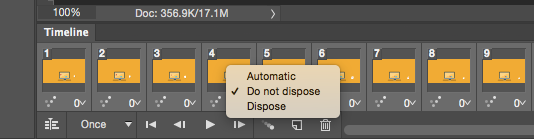
in the timeline menu (hamburger icon in top right-hand corner) first Make Frames from Layers then select all the frames and in the same menu click Reverse Frames.
With the frames selected right click and choose Do not dispose
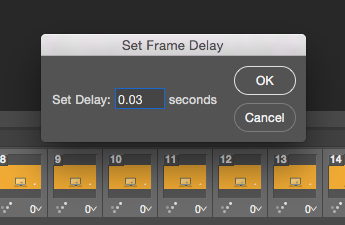
With the frames selected click on ![]() and change the delay to 0.03
and change the delay to 0.03
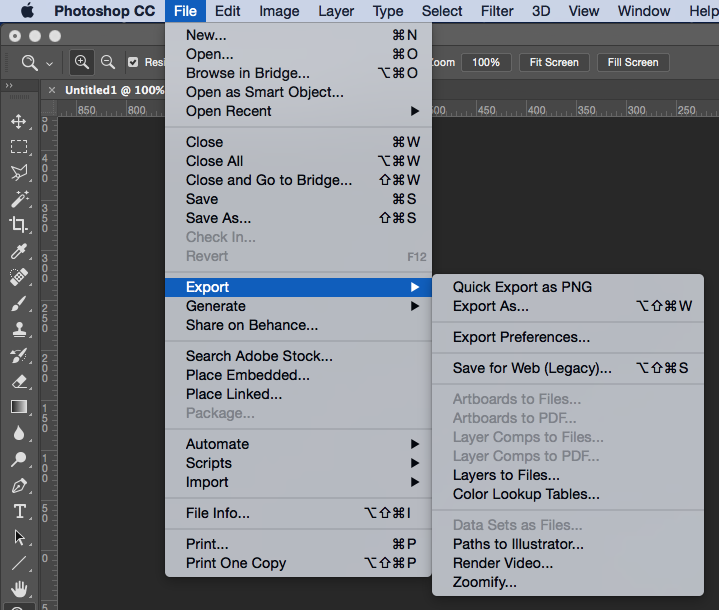
Now go to File > Export > Save for Web (Legacy)
Click Save. Choose the destination folder. Click Save and you’re done!
Method 2: mp4 (this method is a bit quicker than the first one)
When you have finished the animation, export it with Media Encoder:
Media Encoder should start automatically. Change the output format to H.264 and click play (top right-hand corner):
Don’t forget to choose the Output file – which is the place the mp4 will be exported to.
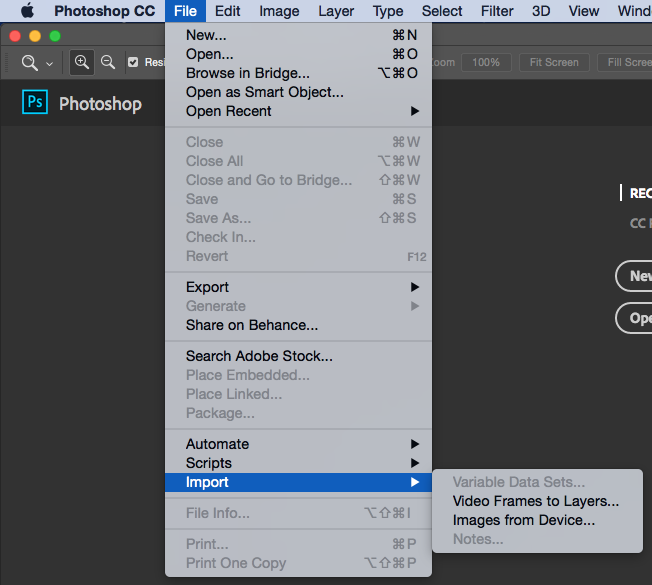
Open Photoshop, go to File > Import > Video frames to Layers
Click Browse and find the exported mp4. Select > Open > OK
It’s important to have the Make Frame Animation box ticked

Once loaded, open the timeline and click Create Frame Animation. Now here, for some reason, my workspace tends to change. If that happens to you go to Window > Workspace and choose your favourite one.
With the frames selected right click and choose Do not dispose
With the frames selected click on ![]() and change the delay to 0.03
and change the delay to 0.03
Now go to File > Export > Save for Web (Legacy)
Click Save. Choose the destination folder. Click Save and you’re done!
These are the only methods without using external programs or websites that I have found. Let me know if you have a better/easier solution.


